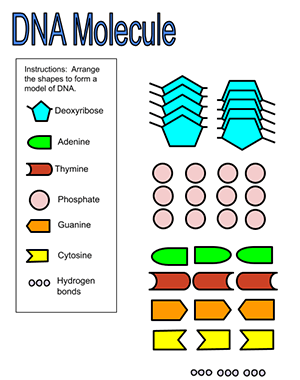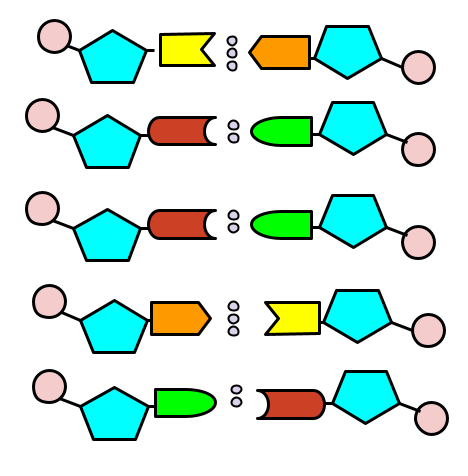
This digital modeling activity allows students to build a DNA model by dragging the individual parts into a completed diagram. Structures, such as deoxyribose, phosphate, and the nitrogen bases are shown. The deoxyribose molecules are arranged so that the finished model will show the anti-parallel strands, and students will not need to rotate any of the pieces.
The bases are shaped so that adenine and thymine fit together, cytosine and guanine also match. Students may need some direction on how to start the molecule, so I show them how to arrange the deoxyribose and phosphates for the first set of nucleotides.
The bases can be added in any order. The phosphate bonds are grouped in twos for bonds between adenine and thymine, and threes for guanine and cytosine. I don’t really focus on that in my introductory class and debated whether to just have the bonds shown in a uniform way. As with all materials I post, you are welcome to modify it to suit your class.
Students are not given much instruction on how to build the molecule, so this activity is probably best after students have been given background information on the double helix. This activity was designed for pandemic teaching where using 3D models and paper activities, like the DNA coloring or the paper construction model were not possible.

This model is completed using google draw, though you could convert it to slides of your students are more familiar with that format. If you use the google drawing I’m sharing here, you will need to “make a copy” of it in the file menu so that you have your own version to assign to students. (They will also need their own copy.)

