My anatomy students spend days learning the names of muscles. We start at the head and work our way down to the legs. We label diagrams and explore anatomical models. Students find naming muscles challenging. The words are long, hard to spell, and have similar sounding names, like biceps and triceps. For a complete guide to the muscle unit, check out this page at my Anatomy and Physiology class.
Naming the muscles isn’t the only thing students need to learn. They also explore how muscles work. Students learn that muscles are categorized as flexors and extensors, agonists, and antagonists. Muscles attach to bones at points called origins and insertions. Bones move due to the action of muscles on those attachment points.
Activity: Flex Your Muscles!
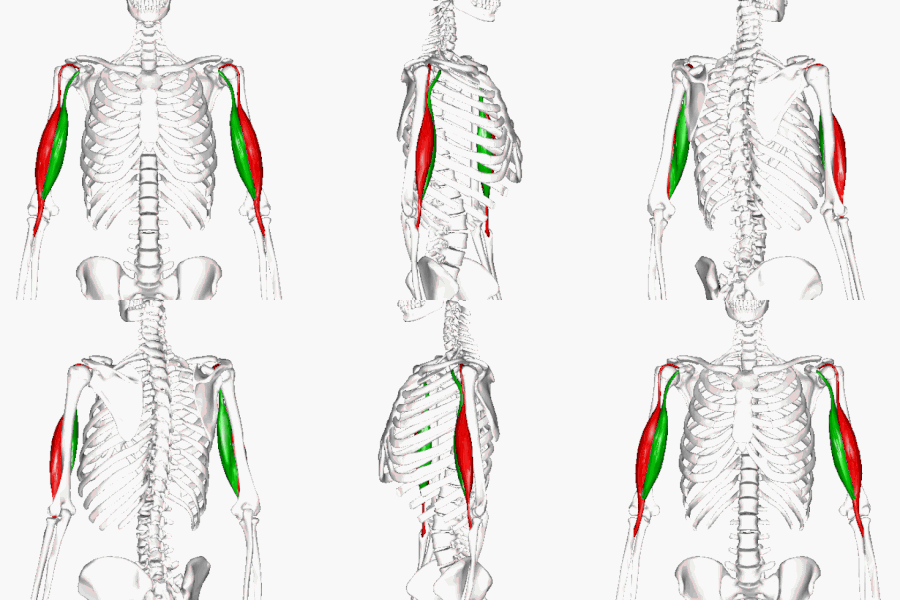
Students examine visuals and descriptions to learn how the biceps and triceps work together to move the arm. I describe the attachment points at the bones and students label those on diagrams. Students answer questions at the end of each section. I don’t usually go into the origin and insertion of all the muscles, that’s just too much for most high school students. Focusing on just one set of muscles can make the task more manageable for this age group. Side note, Wikimedia has some amazing visuals and gifs showing muscles if you want to explore other groups.
This rotating gif is a clear visual on the origin of the two heads of the biceps brachii.

Due to the level of content and specific terminology, I don’t recommend this for basic health classes, though it could be modified. The first page just deals with flexion and extension. On the second page, I focus on the skeletal system attachment points. Because of this, I recommend that this activity is done after the skeletal system unit.
I also have several coloring activities to help students learn the muscles. They seem to like to color and it can be a useful pacing activity, but I’m not convinced that they learn much from it. It really depends on how much they engage with the text and not just the coloring.

