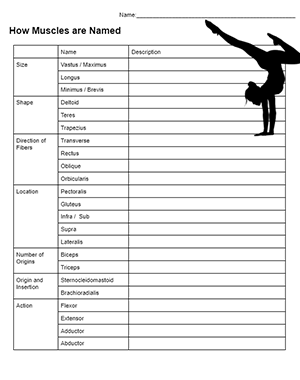
To introduce muscles, I start with explaining the origins of the names themselves using anatomical terminology. This chart has common names seen in muscles groups, like vastus or transverse. As we go through each of the names, students write a description of what the word means.
For example, the word “gluteus” refers to the butt or rump region. Triceps and biceps refer to the number of heads on the muscle. Short muscles are often called brevis, or “brief” muscles. Minimus is for small, maximus is for large, as seen with the gluteus muscles of the rump. Of course, most students have heard of the “gluteus maximus” which means “large butt muscle.” That one is always good for a few laughs!
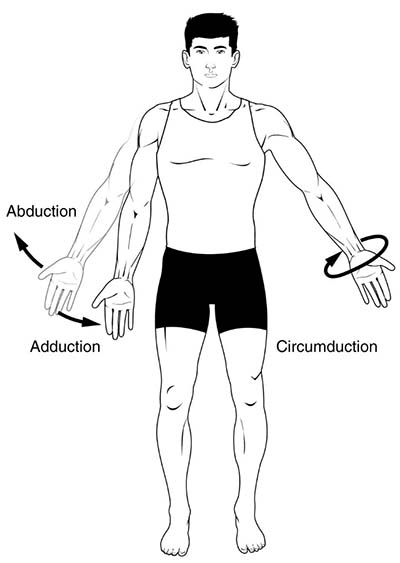
The second part of this activity shows how muscles can be classified according to their movements. For example, adduction refers to the movement of a body part toward the body’s midline. I tell students to think of it as “adding” to the body. Abduction is the opposite, moving away from the midline.
After learning how muscles are named, students proceed to learning the names of muscles found in the body. I start with head muscles, then do chest, arms, and legs. My typical lesson includes a blank diagram of the muscle groups and students color code them and label them. This process can take about a week to go through each group. Typical college level anatomy class would probably go much faster, but my class is a year long class, which gives me extra time. All of these muscle lessons are available at this page.
Movements of the Arm

High school students will find this unit somewhat challenging. It can be difficult to keep all of the names straight! I encourage students to use outside resources, such as the Quizlets linked on the page. Another fun activity is the “Poke a Muscle” game.

